A BMW X5 transfer case fluid change requires a fluid extractor and diagnostic equipment. Access may also require removing the transmission crossmember. This guide is based on a service plan for a 2022 X5 xDrive40i (G05); confirm your vehicle’s equipment and current BMW repair instructions before starting.
Safety: support the transmission before removing the crossmember. Raise and support the vehicle at the approved points, then support and secure the transmission using the equipment and method in the applicable BMW instructions. Maintain that support until the crossmember is securely reinstalled. Never work under a vehicle supported only by a jack.
Parts and supplies
- BMW DTF-1 transfer-case fluid: Have one 1-liter bottle available. BMW’s bulletin discusses approximately 0.7 liter; fill according to the applicable procedure, not by emptying the bottle.
- New filler plug with O-ring: BMW reference 33117525064; confirm fitment for your vehicle.
- Gloves, eye protection, clean wipes, and a container for used fluid.
- Replacement crossmember and other access fasteners as specified by the applicable VIN-specific instructions. The original plan’s candidate hardware and renewal requirements remain unconfirmed.
Tools
Check the actual fasteners and clearance before starting. Socket sizes below are preparation leads, not a verified list for every X5.
- 14 mm internal-hex bit socket, preferably low-profile — candidate for the filler plug.
- E10 external Torx socket, plus an E-Torx set — check the installed fasteners.
- 13 mm, 16 mm and 18 mm sockets, ratchet and extensions — candidate sizes for access hardware.
- Torque wrenches appropriate for the applicable fastener values, including 60 Nm.
- Fluid extractor with suitable narrow pickup, clean refill pump and measuring container. BMW specifies tools 0 493 337 (00 2 080) and 2 457 963 for extraction.
- Rated vehicle lifting and support equipment, and the specified transmission support and securing strap.
- BMW ISTA or a compatible diagnostic system with both the transfer-case oil-change and calibration functions.
The socket suggestions come from a G05 video and a general transfer-case guide. The G05 video does not show proper support of the assembly during crossmember removal; follow the safety instruction above instead.
Before you begin
Obtain the current BMW transfer-case oil-change and crossmember instructions for your VIN, including the fastener replacement rules, torque, angle and sequence. Confirm access to the diagnostic functions and suitable fluid-handling tools before disassembly.
The original plan identified three short bolts, three long bolts and one mount bolt as candidates. Their exact fitment and renewal requirements were not established. Do not assume reuse is permitted or that the whole set must be replaced.
Prepare and support
- Raise and support the vehicle safely at the approved lifting points. Connect the diagnostic system.
- Remove the necessary underbody panels. Before removing the crossmember, support and secure the transmission as specified by BMW. Follow the applicable removal instructions and track the fasteners.
- In the diagnostic system, select Service functions → Drive → Transfer box VTG → Oil change. Follow its prompts throughout the service.
BMW X5 transfer case fluid change: extract and refill
- Open the filler plug and extract the used fluid with the appropriate equipment. Collect the fluid for proper disposal.
- Add approved DTF-1 fluid using clean equipment. Follow the diagnostic prompts and BMW’s applicable filler-level instruction; do not pour in the entire one-liter bottle by default.
- Install a new applicable filler plug. BMW’s SIB 27 02 20 specifies 60 Nm (44 lb-ft) for the M22 plug. Confirm that this applies to the installed plug and current instruction.
Reassemble and calibrate
- Reinstall the crossmember and underbody panels using the applicable BMW fastener replacement, sequence and torque instructions. Keep the transmission supported until the crossmember is securely installed.
- Run Service functions → Drive → Transfer box VTG → Calibration and follow the diagnostic prompts.
- Check for leaks and confirm that supports and panels are installed and both diagnostic functions completed. Record the date, mileage, fluid and amount used, fasteners replaced, and any follow-up.
Torque reference
- Transfer-case M22 filler plug: 60 Nm (44 lb-ft) per BMW SIB 27 02 20; confirm applicability.
- Crossmember-to-mount and crossmember-to-body fasteners: Verify torque, replacement rules, angle and sequence in the current VIN-specific BMW instruction 22 32 050.
- Underbody panels and other disturbed fasteners: Identify the installed hardware and use the applicable VIN-specific instructions.
BMW’s bulletin addresses a shudder diagnosis; it does not establish a routine service interval or mean this vehicle has that fault. For current repair instructions, consult the BMW technical information portal.
Video references
- FCP Euro G05 X5 drivetrain service video — a G05 visual companion covering transfer-case and differential service.
- G05 transfer-case fluid walkthrough — an additional model-focused reference; exact filmed trim not established.
Warning about the second video: It does not show the transmission and transfer-case assembly properly supported before crossmember removal. Do not follow that part. Use the support equipment and method in the applicable BMW instruction, and keep the assembly supported until the crossmember is securely reinstalled.
The video descriptions were checked, but the videos were not reviewed frame by frame. Use them alongside the current BMW repair instructions.
Explore more BMW DIY articles for other maintenance and repair topics.

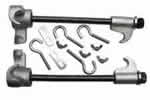
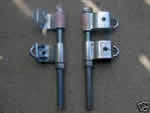
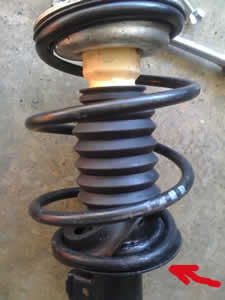 My latest attempt last night looked almost as it should be. Just on one side rubber pad seamed a little bit off. And here is how it looked by this morning. Spring pushed rubber out completely on one side. So I have to compress spring again and try to realign everything. I just wonder what I was doing wrong since I can not get spring in place correctly.
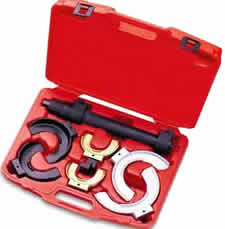 I also wonder if compressors like the one below works on E46 since although they look similar BMW’s one shown in TIS. The one from TIS uses kind of ring adapter to press against upper plate. For some reason it seams like it should compress spring more evenly. Did anybody try such compressors?
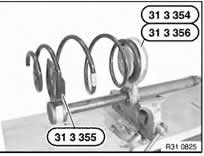 Here is screenshot from TIS. The tool is shown assembled for E46 and upper adapter (it is the right one on the picture) is actually a ring. It does not look like anything from kit above could be used like that ring. And without such ring it would be worthless as any other cheap compressor just because there are not enough coils in spring