Changing coolant on a BMW X5 G05 or X3 G01 can involve more than emptying the expansion tank and pouring in fresh fluid. Coolant remains throughout the engine, radiator, heater and other parts of the system, and the correct filling and bleeding procedure depends on the vehicle. This BMW coolant hose adapter is a prototype intended to connect an expansion tank hose to 3/8-inch inside-diameter tubing.
This post covers the idea and the adapter built for it. The adapter is still a prototype: its seal and its suitability for hot, pressurized coolant have not been verified, and a coolant exchange using it has not been documented. The project targets the X5 G05 and X3 G01, but fit has not been established across their different years, engines and cooling circuits. Check the connector and service instructions for your exact vehicle before choosing a drain, fill or bleed method.
Why use an expansion tank hose?
The hose connection offers a possible access point for collecting or moving coolant without improvising a connection to the BMW quick connector. The goal of the adapter is simple: one end is designed to fit the hose’s spring-clip connector, while the other connects to 3/8-inch inside-diameter tubing leading to suitable equipment or a collection container.
That connection alone does not establish a complete exchange procedure. Hoses can serve different circuits and flow in different directions. Depending on the vehicle, disconnecting one may drain only part of the system, and moving coolant through it may not reach every passage. The proper hose, flow path, equipment and sequence must be established for the specific car before attempting the job.
Making the BMW coolant hose adapter
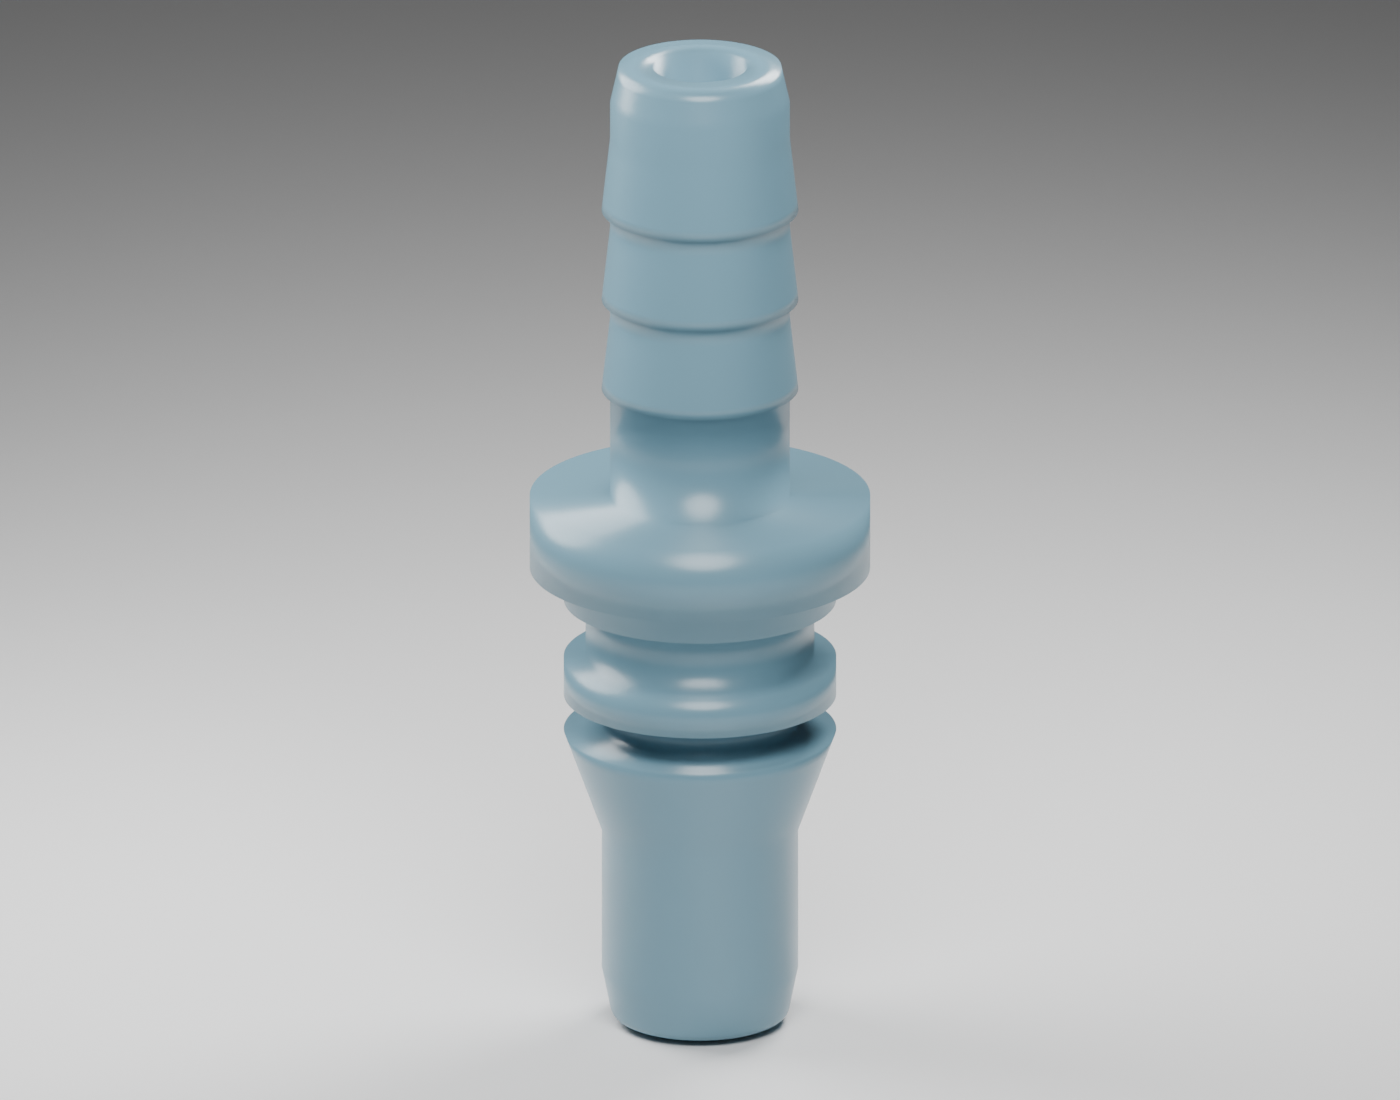
The project started with a 3D model of the quick-connect end and a separate fit-test piece. The first physical prototype exposed an important mistake: it was missing the first groove behind the tapered shoulder, so the spring clip did not lock. A later revision added the groove using measurements from the original fitting.
A subsequent fit felt loose and wobbly, so the sealing diameter was increased slightly and the edge of the mating end was rounded. Those changes are trial dimensions, not verified factory specifications.
The fit coupon is useful for checking the shape and whether the retaining clip engages. It does not prove that the full adapter seals, withstands pressure or remains sound in hot coolant. In particular, a printed part should not be installed in an operating cooling system on the strength of a clip-fit test. Use a fitting and hose rated for the fluid, temperature and pressure of the intended service.
Download the 3MF models
Download the adapter and fit coupon 3MF models (ZIP). The archive contains only the two model files, without printer projects or presets.
Import the 3MF files into your slicer and choose settings for your own printer and material. Start with the coupon and remove any support material from its grooves before checking the fit. No printed material or adapter has been established as safe for hot, pressurized coolant service.
Planning the coolant change
Before disconnecting anything, find the BMW service procedure and coolant specification for the exact vehicle. Identify the cooling circuit and the hose you intend to use, then determine whether BMW specifies a conventional drain, vacuum filling, an electric-pump bleeding procedure or another method. Arrange the specified equipment and the correct quantity and mixture of fresh coolant.
BMW cooling systems and bleeding procedures differ by vehicle and circuit. Use the current service instructions for your specific vehicle and circuit rather than assuming one procedure applies to every X5 or X3.
If a hose-based exchange is appropriate for the vehicle and equipment, the general plan is to work with the system fully cold, collect the old coolant in a suitable container, reconnect the system securely, and fill and bleed it using the vehicle-specific procedure. Determine the actual flow path and connections from that procedure and the equipment instructions; do not assume that an expansion tank hose is a universal inlet or outlet. A partial drain or exchange should be described as partial unless the amount and procedure establish otherwise.
Never open the cooling system hot or under pressure. Protect electrical components, including the alternator, from spills and do not reuse drained coolant. Use the specified coolant and concentration rather than choosing by color alone.
After filling and bleeding, inspect the connections for leaks and check the coolant level as directed in the vehicle’s service procedure. Stop and investigate any leak, overheating warning or abnormal behavior. Keep used coolant away from children and animals, and take it to a local collection facility that accepts antifreeze; the EPA’s recycling guide suggests checking local collection options.
What remains to be tested
The next step for this project is to verify the revised adapter’s mechanical fit and seal under controlled conditions appropriate to its intended use. The vehicle-specific exchange route, equipment and bleeding procedure also need to be established. Until those checks are complete, the printed adapter is a development project, not a proven coolant-service tool.
Leave a Reply